Getting started
Run the server and connect one machine to it, end to end. Everything below happens on a single machine that runs both the server stack and Claude Code, so every address is loopback (127.0.0.1).
Each step is the short path. The linked pages carry the full options and the reasons behind them.
1. Check the requirements
- Go 1.25 or later, to build the client.
- Docker with Compose, to build and run the server and the database.
- A clone of this repository. Run every command below from its root.
The server image builds the dashboard inside Docker, so this path does not need Node.js on the host.
2. Build the server images
Both image tags exist only locally; compose uses pull_policy: never and fails instead of pulling.
docker build -t cctrace/timescaledb-pgmq:latest docker/timescaledb-pgmq/
docker build -f deploy/Dockerfile --build-arg UPDATE_SIGNING=optional \
  -t cctrace/cctraced:latest .
UPDATE_SIGNING=optional builds without an update-signing key. Details: Server install.
3. Set the required values
Copy the example env file, then edit 3 keys: JWT_SECRET and LOGS_DIR have no default and the stack does not start without them; DB_PASSWORD ships with a placeholder you should not keep.
$ cp deploy/.env.example deploy/.env
$ jwt_secret=$(openssl rand -hex 32) && sed -i.bak "s|^JWT_SECRET=.*|JWT_SECRET=${jwt_secret}|" deploy/.env
$ db_password=$(openssl rand -hex 20) && sed -i.bak "s|^DB_PASSWORD=.*|DB_PASSWORD=${db_password}|" deploy/.env
$ LOGS_DIR=/absolute/path/on/the/host/for/logs && mkdir -p "$LOGS_DIR" && sed -i.bak "s|^LOGS_DIR=.*|LOGS_DIR=${LOGS_DIR}|" deploy/.env
$ rm deploy/.env.bak
Decide DB_PASSWORD before the first start
Postgres applies the password only when the data volume is initialised. Changing it later leaves the role on the old value, and cctraced restart-loops with password authentication failed. Recovering means dropping the database volume, which discards collected data.
deploy/.env.example lists every other value. The dashboard binds to 127.0.0.1:8080 by default; OTLP binds to all host interfaces on 4317 and 4318 without TLS. See Configuration before exposing the host to a network you do not control.
4. Start the stack
$ docker compose --env-file deploy/.env -f deploy/docker-compose.yml up -d
$ docker compose --env-file deploy/.env -f deploy/docker-compose.yml ps
$ curl -fsS http://127.0.0.1:8080/api/health

A bad value fails at server startup, not at up -d. If cctraced is restarting rather than Up, read its logs:
$ docker compose --env-file deploy/.env -f deploy/docker-compose.yml logs cctraced
5. Create the first admin
-
Find the setup token in the same logs, on the line
[cctraced] initial administrator setup token:. To choose the token yourself, setCCTRACE_SETUP_TOKENin the.envfile before the first start.
-
Open
http://127.0.0.1:8080. With no users yet, the dashboard sends you to/setup. - Enter the setup token, your email, name, and a password of at least 8 characters.
The token stops working once the first admin exists. Details: First admin.
6. Create a user for the client
cctrace init signs in with a cctrace User ID, not an email, and refuses an account without a team. The first admin has neither. To connect as the admin, open its row menu on Users > Management, select Edit, and fill in Team and cctrace User ID. To connect as someone else, create a separate account:
- On Users > Management (
/users), select Add User. -
Enter another email, a name, a Team, and a cctrace User ID such as
alice. Keep the roleuser.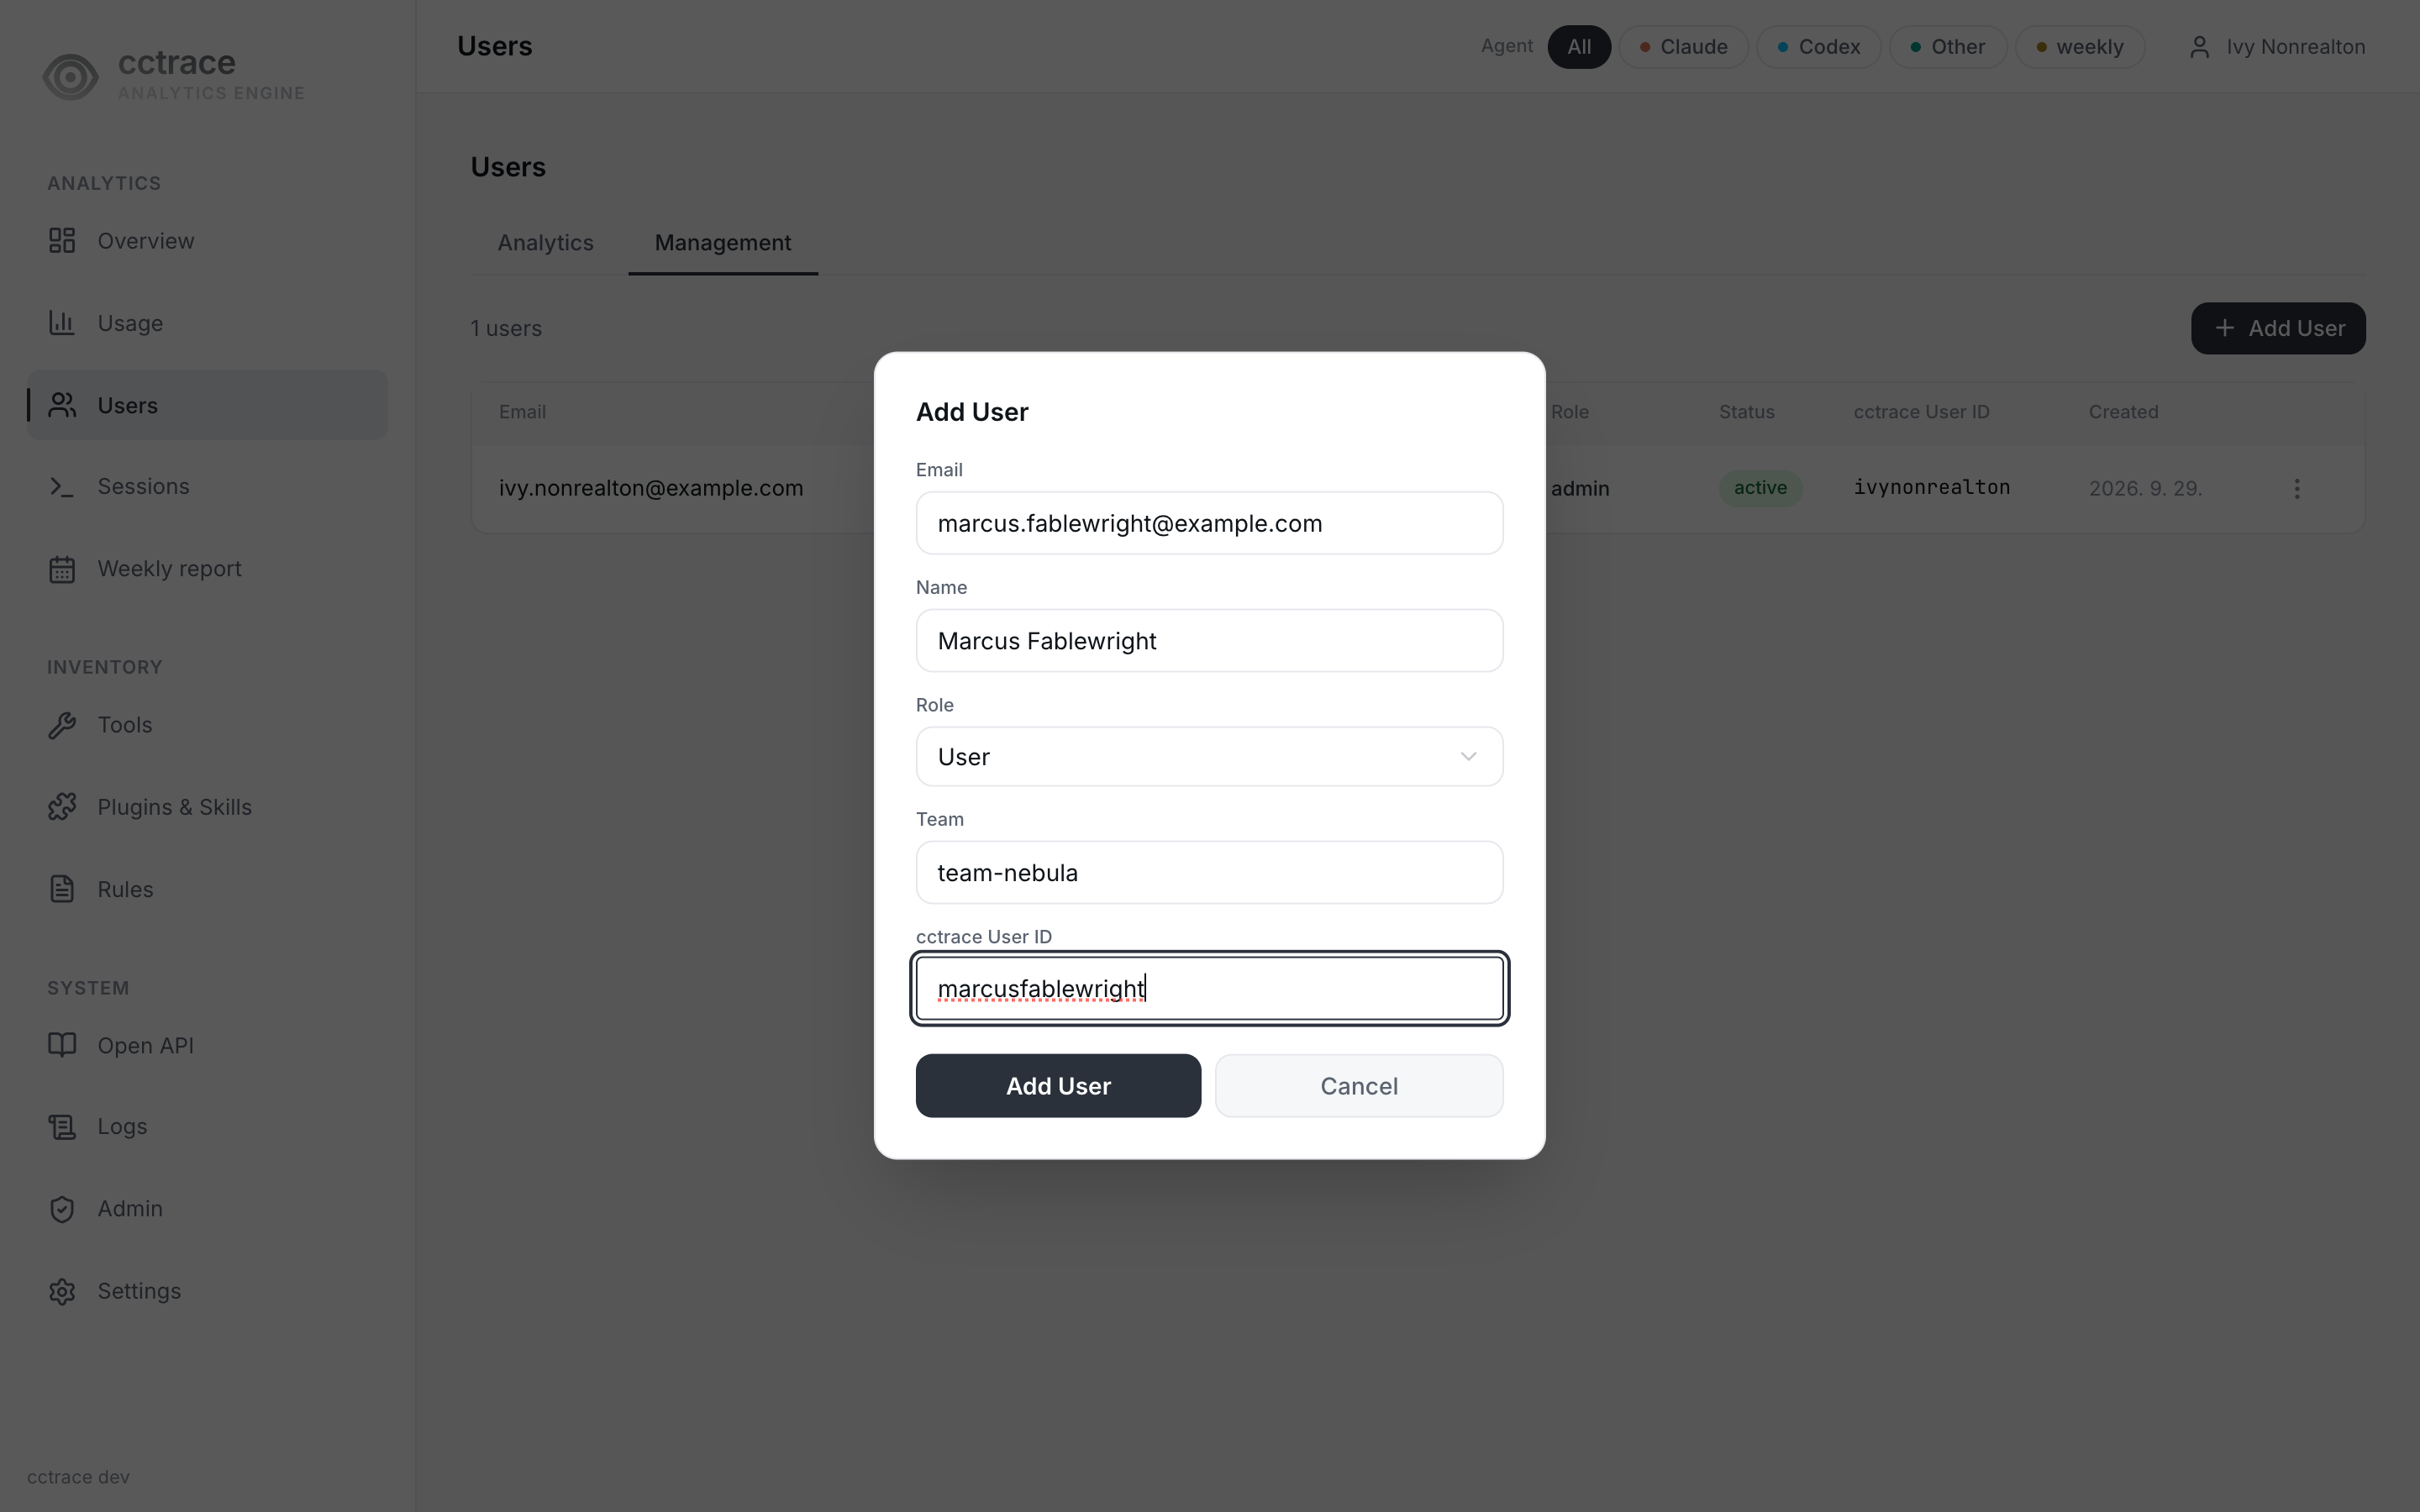
-
Copy the temporary password the dialog shows.
-
Sign out, sign in as the new account with the temporary password, and set a new password on the Settings page the dashboard sends you to.
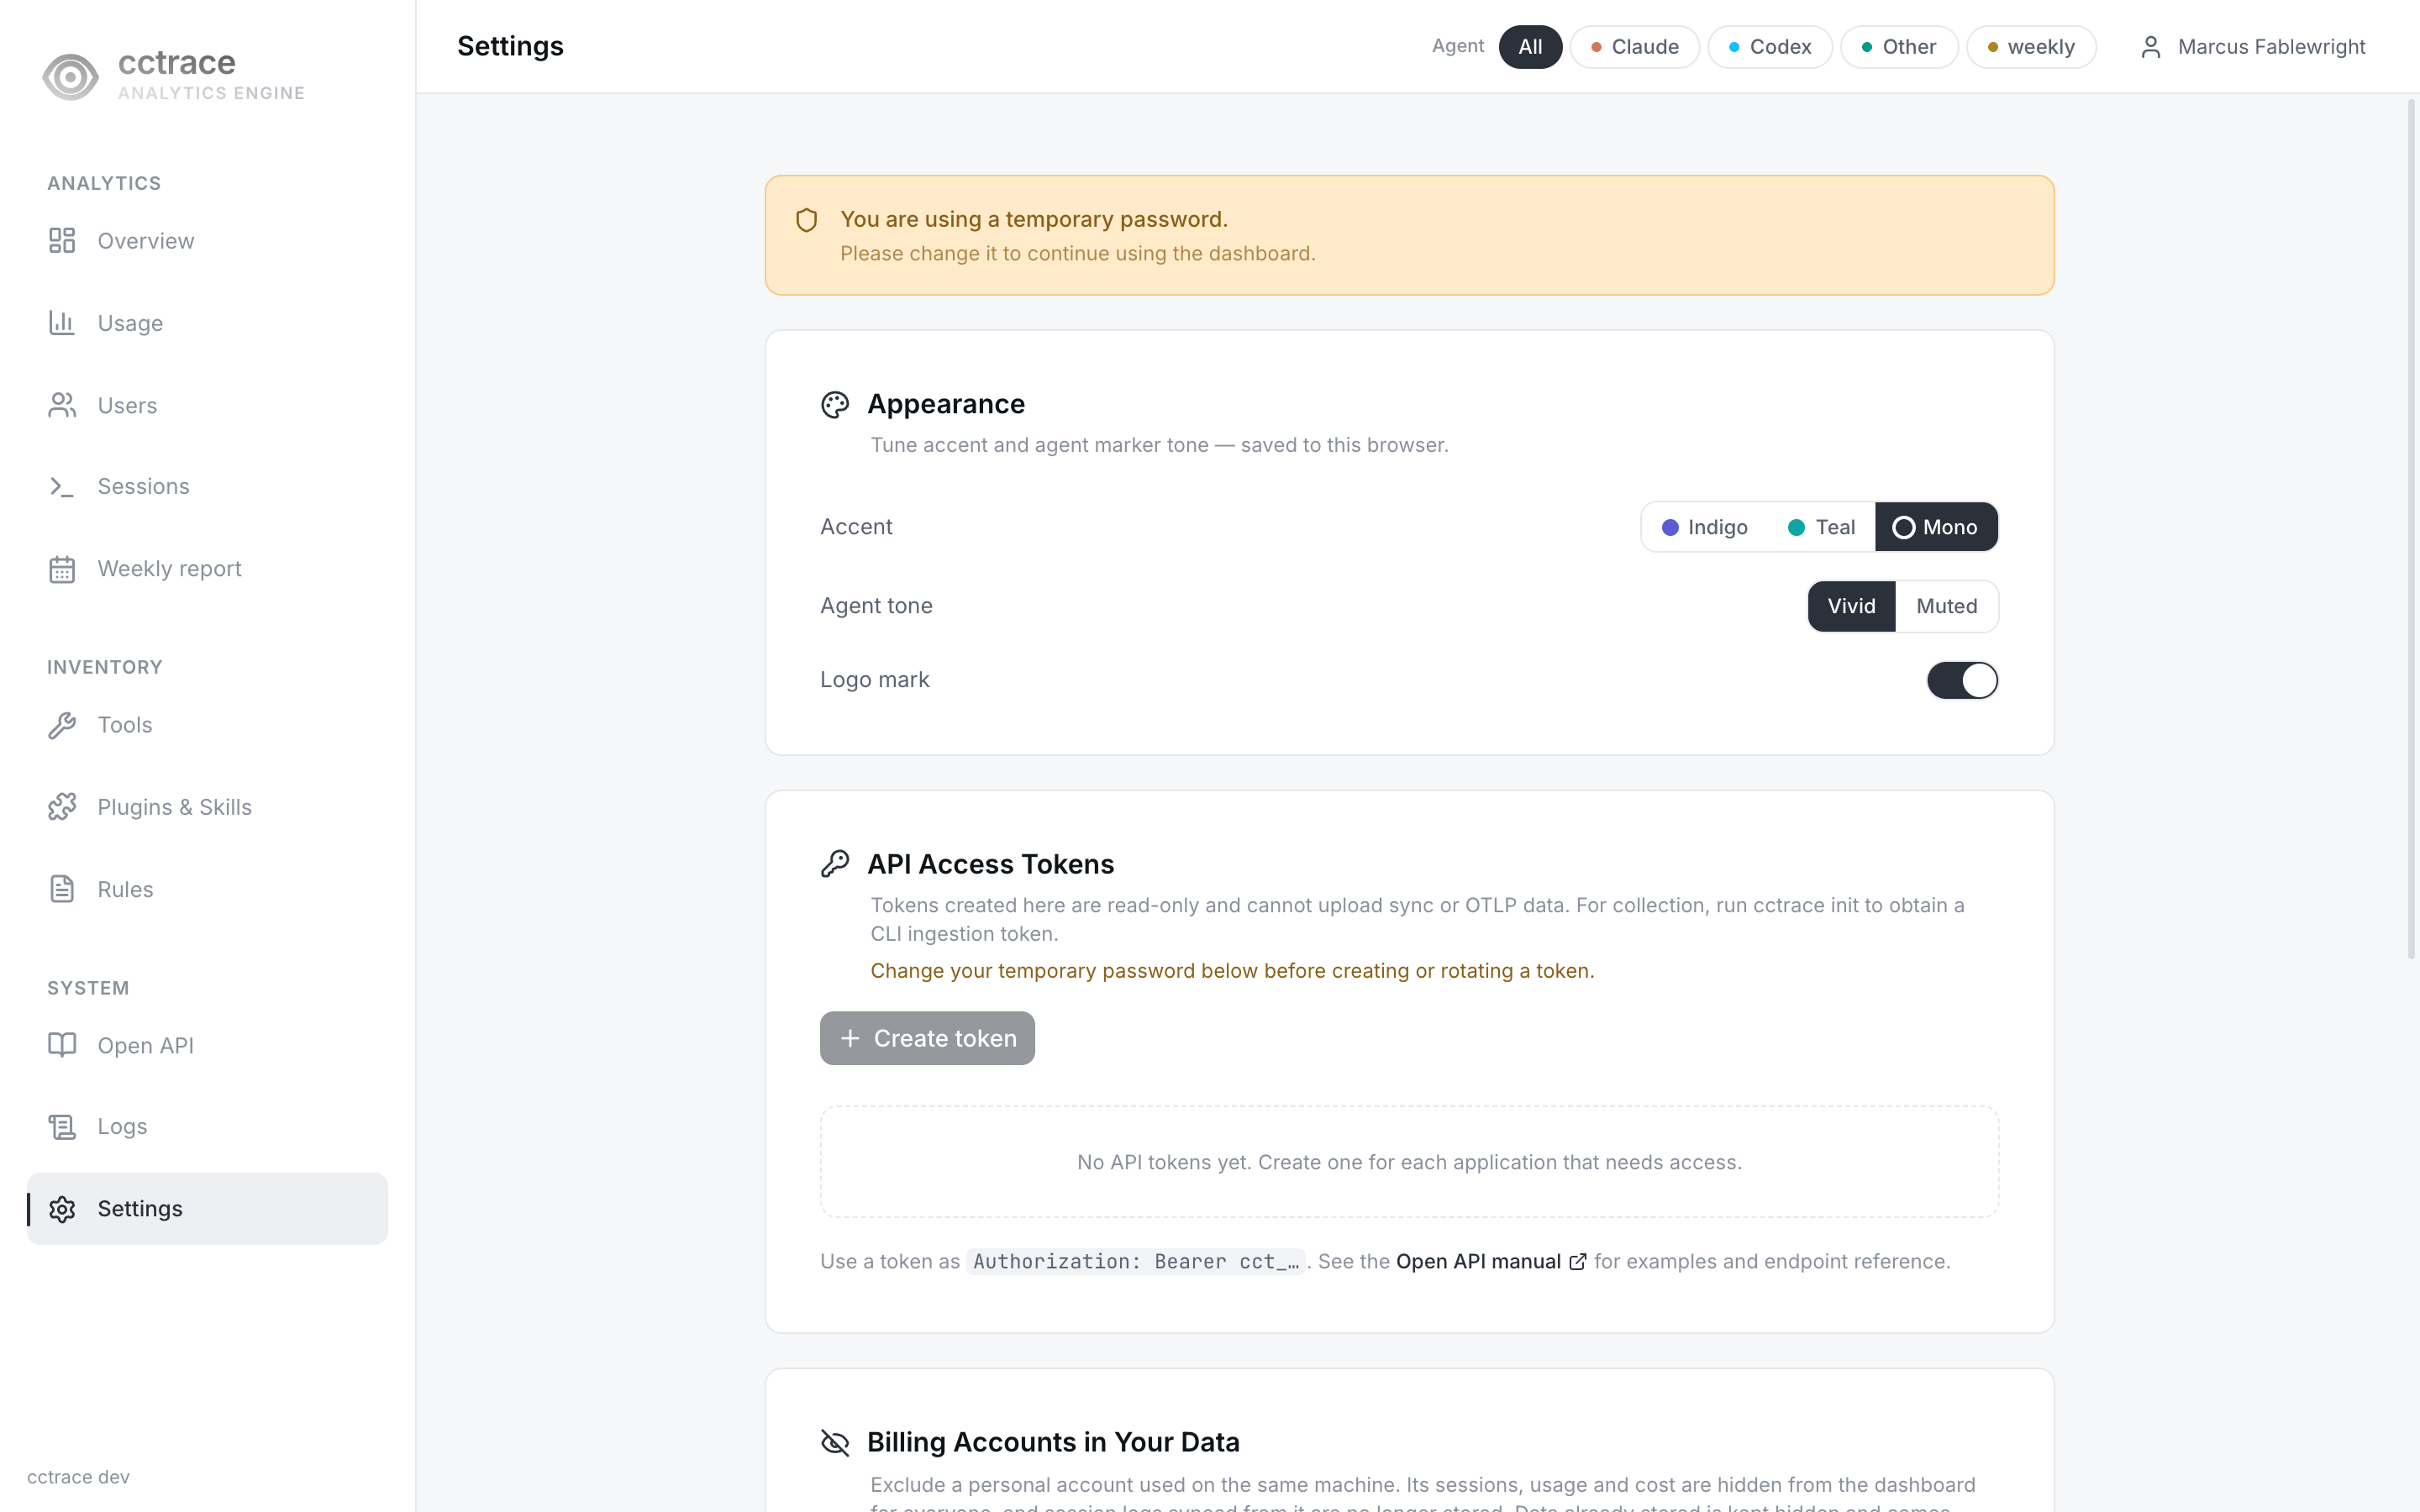
cctrace init refuses the temporary password until it is changed. Details: Users.
7. Build and install the client
$ make build-client
$ sudo cp dist/cctrace /usr/local/bin/cctrace
make build-client builds for the current platform into the dist directory. If you skip the copy, cctrace init offers to install itself into /usr/local/bin (macOS and Linux) when it is not on your PATH.
Building needs Go. If your machine can instead reach the server over the network, download the matching binary from it and skip the Go toolchain entirely: see Client install.
8. Connect the client
$ cctrace init
Answer the prompts:
| Prompt | Value for this setup |
|---|---|
| Sync endpoint | http://127.0.0.1:8080 |
| OTEL endpoint | http://127.0.0.1:4317 |
| User ID | the cctrace User ID from step 6 |
| Temporary password | the new password you set in step 6 |
| Enable session log sync? | y |
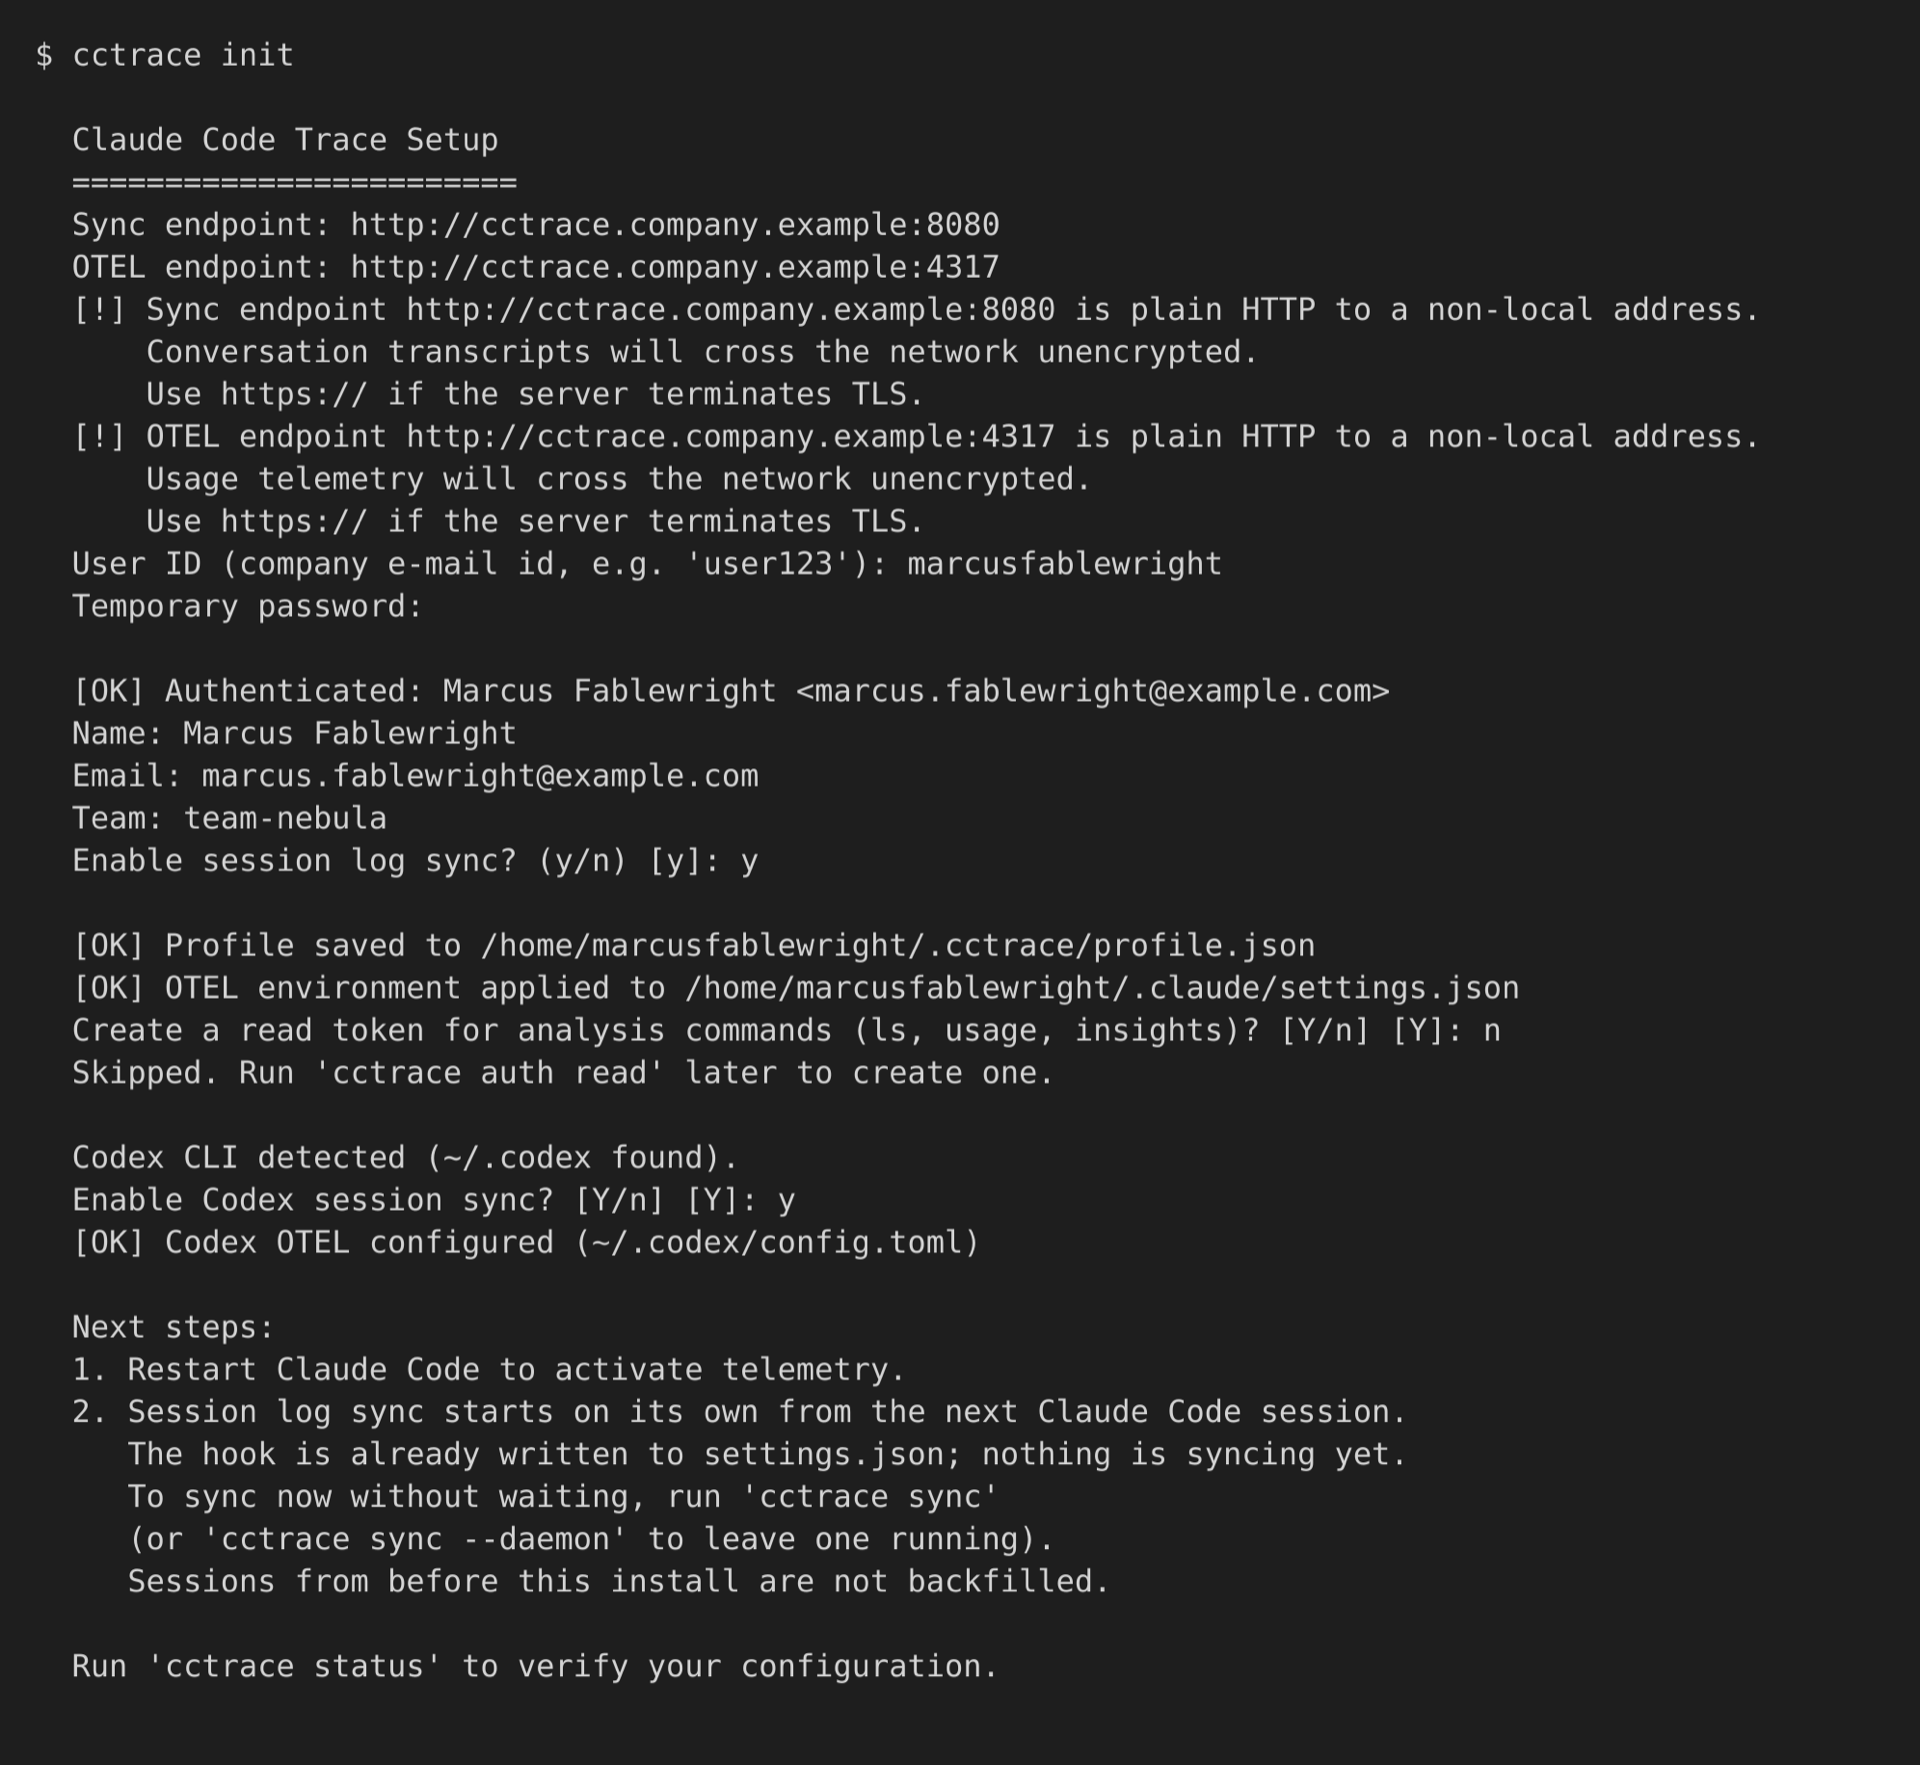
init writes the profile to ~/.cctrace/profile.json and applies the OTEL environment (gRPC to 4317) and the sync hooks to ~/.claude/settings.json. It then offers a read token for the analysis commands; collection does not need it, so you can answer n. If ~/.codex exists, it also offers Codex session sync and writes Codex's OTLP/HTTP exporter to port 4318 (see Codex CLI). Details: Connect.
9. Restart the agent
Restart Claude Code. Telemetry starts from the new process, and session log sync starts on its own from the next Claude Code session. Sessions from before the install are not backfilled. To sync without waiting, run:
$ cctrace sync
10. Confirm it works
$ cctrace status
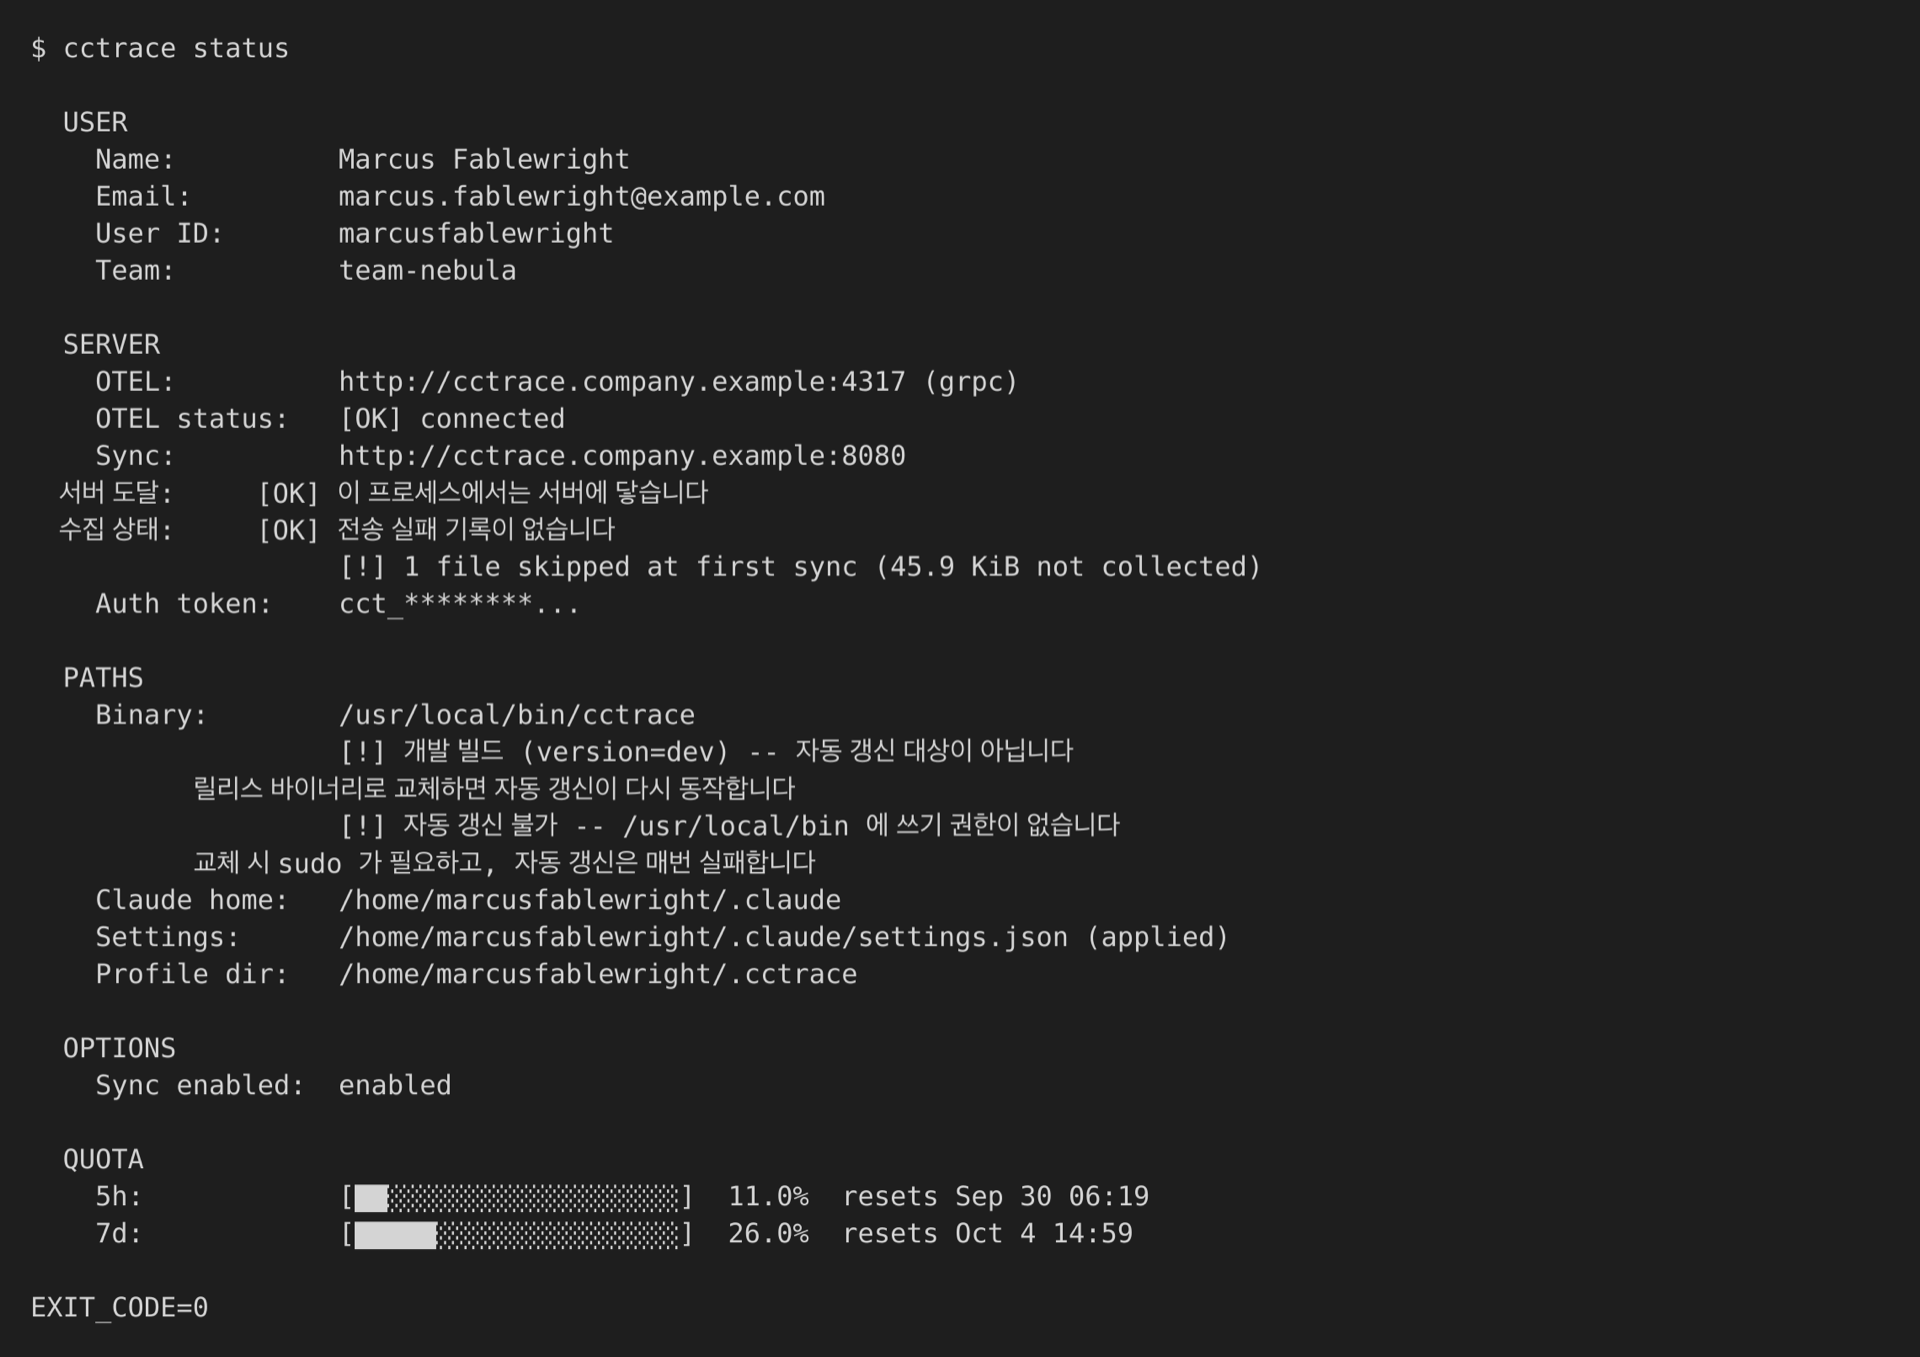
Check the SERVER section for OTEL status: [OK] connected, and the PATHS section for Settings: ending in (applied). The command exits with status 2 when the OTEL endpoint is unreachable.
Then run a short Claude Code session and open http://127.0.0.1:8080/sessions. The session appears there once it has synced -- under the Interactive filter, which is the page's default, for an ordinary session with human turns. A machine-driven session (for example one started with claude -p) is a Headless session instead; switch to Headless or All to see it. See Dashboard pages.
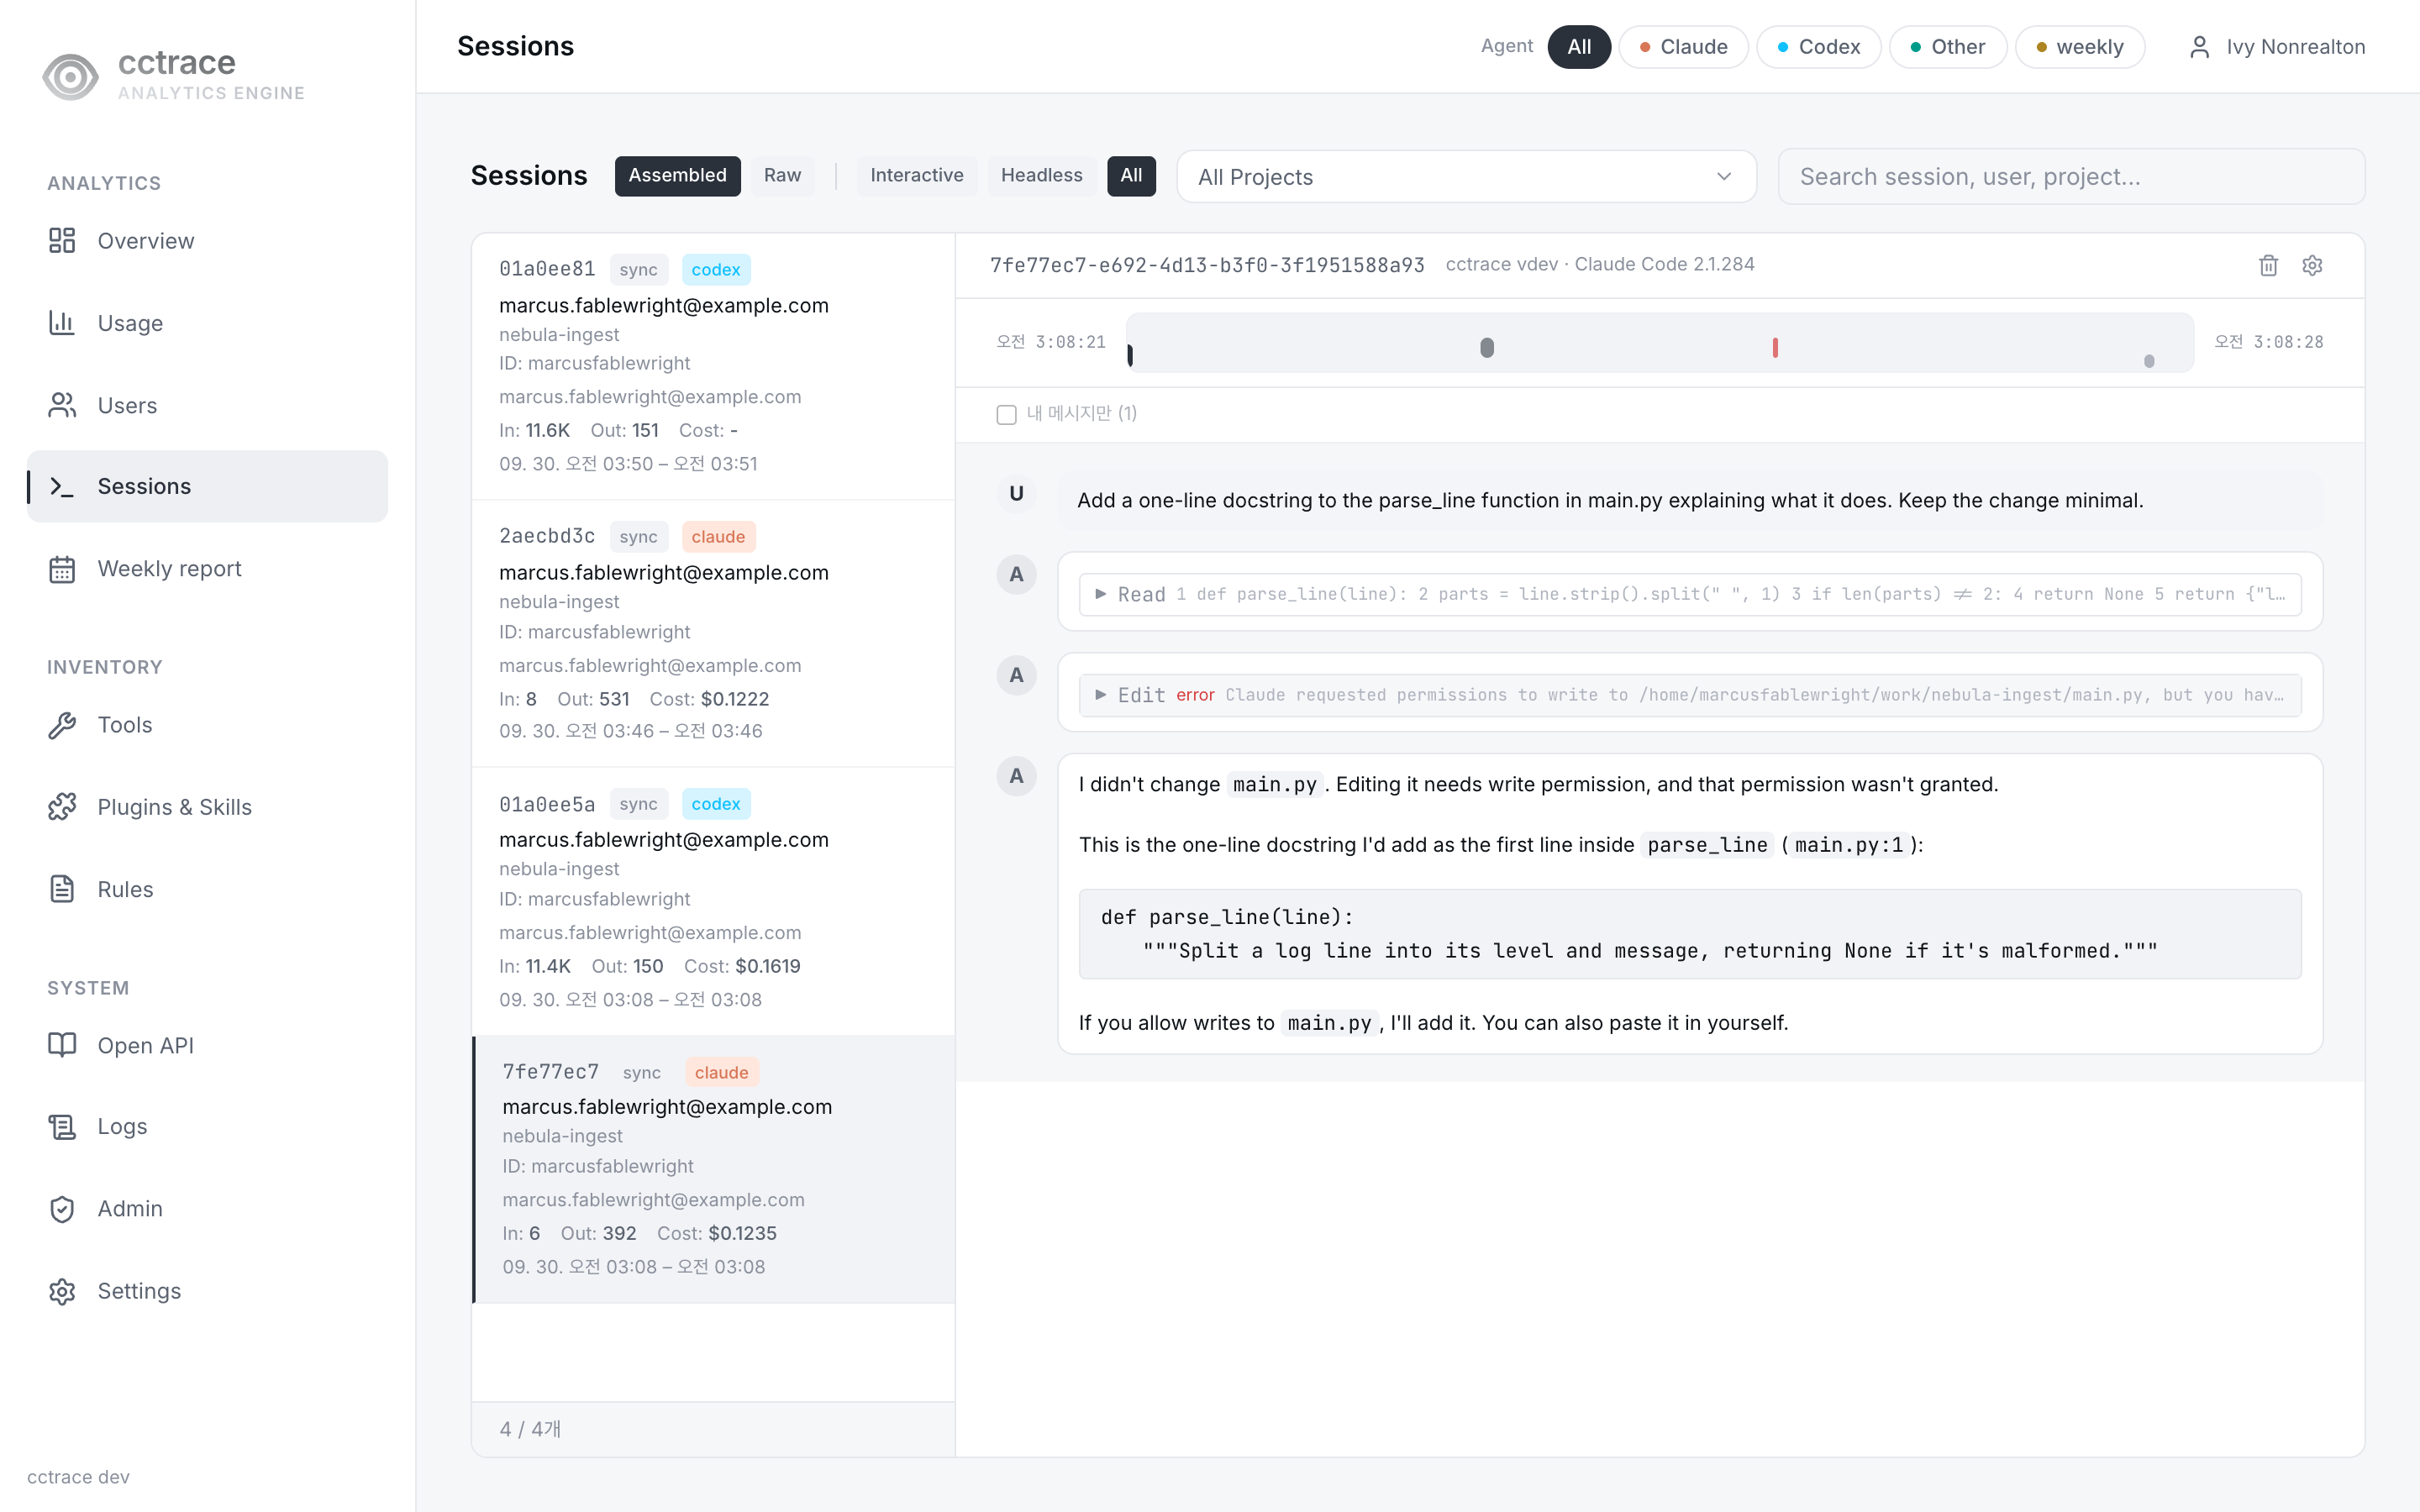
If something does not show up, see Sync daemon and Operations.